

How To Make A Gundam Model Logo Template
When you lot create a presentation and then save it as a PowerPoint template (.potx) file, you tin share it with your colleagues and reuse it over again. To create a template, you'll need to modify a slide primary and a set of slide layouts.
Choose from thousands of free templates to download at Microsoft templates
Click a heading beneath to open the section and see detailed instructions:
-
Open a bare presentation: File > New > Bare Presentation
-
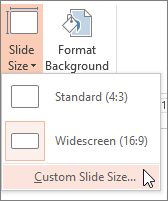
On the Blueprint tab, select Slide Size > Custom Slide Size and choose the page orientation and dimensions you desire.
-
On the View tab, in the Master Views group, choose Slide Chief.
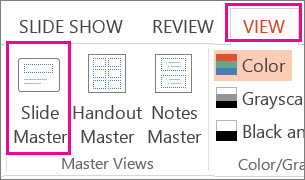
The slide master is the largest slide image at the top of the slide thumbnail listing, to the left of your slides. Associated slide layouts are positioned beneath the slide master.

-
To brand changes to the slide master or slide layouts, on the Slide Master tab, do whatsoever of the post-obit:
-
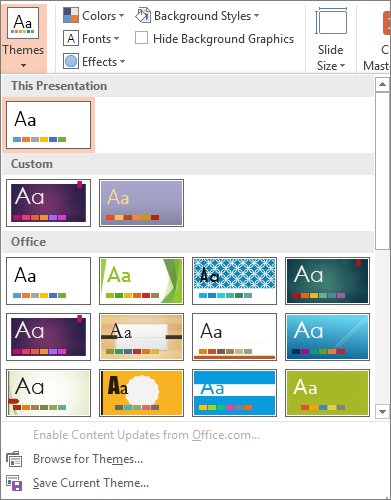
To add a colorful theme with special fonts and furnishings, click Themes, and choose a theme from the gallery. Utilize the scrollbar on the correct to come across more themes.
-
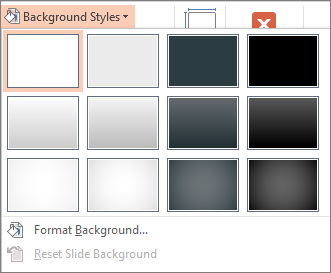
To change the background, click Background Styles, and choose a background.
-
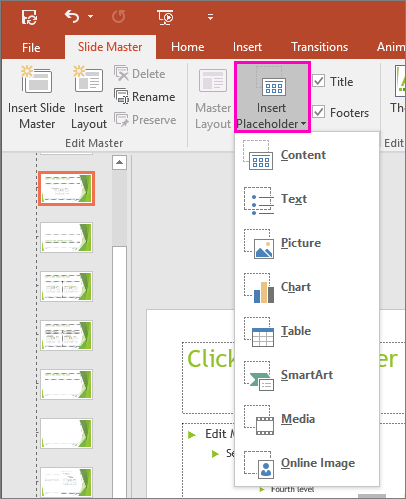
To add a placeholder (to hold text, a picture, chart, video, sound, and other objects), in the thumbnail pane, select the slide layout that you lot want to hold the placeholder, and do the following:
-
Click Insert Placeholder, and select the type of placeholder you want to add.
-
On the slide master or slide layout, click and drag to describe the placeholder size.
Tip: To resize a placeholder, drag the corner of one of its borders.
-
-
To move a placeholder around on a slide master or slide layout, select the edge and so drag it into a new position.

-
To remove an unwanted placeholder in a slide master or slide layout, select it in the slide thumbnail pane, and then select the border of the placeholder on the slide and press Delete.
-
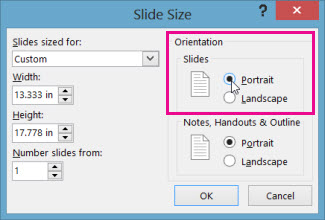
To ready the folio orientation for all of the slides in your presentation, click Slide Size > Custom Slide Size.
Under Orientation, choose Portrait or Landscape.
-
-
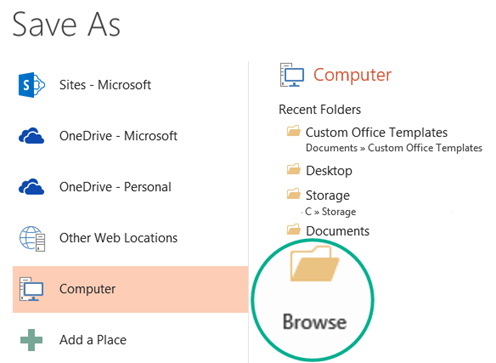
On the File tab, click Save As (or Relieve a Copy, if y'all are using Microsoft 365).
-
Under Save, click Browse to open the Relieve As dialog box.
-
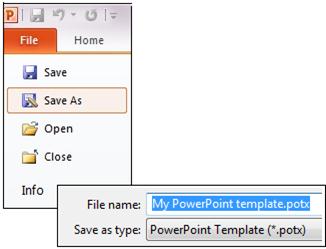
In the Save As dialog box, in the Save as type list, cull PowerPoint Template.
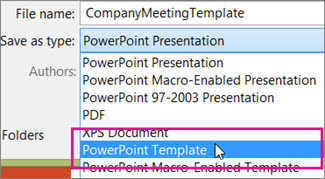
When you choose the "template" type, PowerPoint automatically switches the storage location to the appropriate folder, the Custom Office Templates folder.
-
In the Save Every bit dialog box, in the File name box, type a file proper name for your template, or practise nothing to accept the suggested file name.
-
Select Save.
-
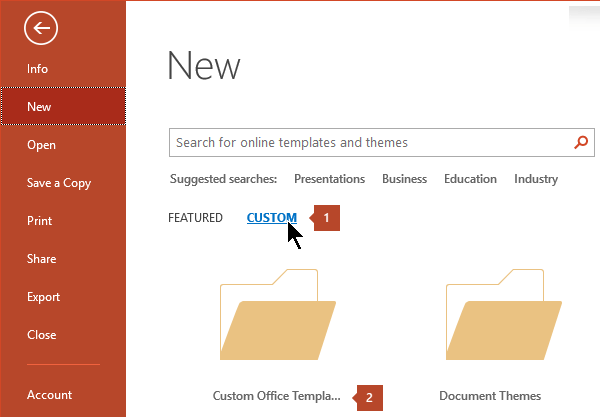
To use your template for a new presentation, click File > New. So click Custom > Custom Office Templates, and then double-click the template you saved.
See Also
Create your own theme in PowerPoint
Save a slide design (theme) as a template
Edit, alter, or delete a placeholder
What is a slide principal?
What is a slide layout?
Create and use your own template in Office for Mac
Important: Office 2010 is no longer supported. Upgrade to Microsoft 365 to work anywhere from whatsoever device and continue to receive support.
Upgrade now
On the File tab, click Save Every bit, in the File name box requite your template a name, and then in the Save as blazon box, select PowerPoint Template (*.potx).
Click a heading below to open the department and encounter the instructions:
To brainstorm creating the template that yous'll apply in your presentation, do the following:
-
Open a blank presentation.
-
On the Design tab, select Page Setup, and choose the orientation and page dimensions you want.
-
On the View tab, in the Master Views group, click Slide Main.
Tip: In Slide Master view, in the slide thumbnail pane, the slide master represents the larger slide image, and the associated layouts are smaller, positioned beneath it.
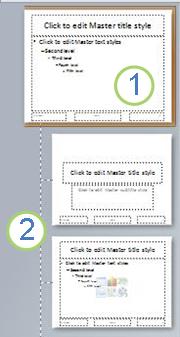
one. Slide master
2. Associated layouts
-
To customize the slide chief and associated layouts, do ane or more than of the post-obit:
-
To remove an unwanted, default placeholder from a layout, in the slide thumbnail pane, click the slide layout that contains the placeholder, click the border of the placeholder in the presentation window, then press DELETE.
-
To add a text placeholder, in the slide thumbnail pane, click the slide layout that you want to incorporate the placeholder, and then exercise the following:
-
On the Slide Main tab, in the Main Layout group, click Insert Placeholder, and then click Text.
-
Click a location on the slide master, and and so drag to depict the placeholder.
Tip: To resize a placeholder, drag the corner of i of its borders.
-
Type descriptive text that prompts the users of your template to enter specific data.
-
-
To add other types of placeholders that incorporate content such every bit pictures, clip art, screen shots, SmartArt graphics, charts, movies, sounds, and tables, on the Slide Master tab, in the Master Layout group, click Insert Placeholder, and and so click the type of placeholder that you want to add.
-
To add character past using color and a background, practice one of the following:
-
To utilize a theme (to include color, formatting, furnishings, in a layout) to your presentation, on the Slide Master tab, in the Edit Theme group, click Themes, and and then select a theme.
-
To alter the background, on the Slide Master tab, in the Background grouping, click Background Styles, and then select a background.
-
-
-
To save your template, click the File tab, and then click Salve As.
-
In the File name box, type a file proper noun, or practice nothing to take the suggested file name.
-
In the Save as blazon list, click PowerPoint Template (.potx).
When you cull the "template" type, PowerPoint automatically switches the storage location to the advisable folder, the \Program Files\Microsoft Function\Templates\ folder.
-
Select Relieve.
-
To use your template for a new presentation, click File > New. So click My templates. In the New Presentation dialog box, select the template you lot saved, and click OK.
If you lot need assistance applying your new template to a presentation, see Apply a template to your presentation.

Links to more information well-nigh PowerPoint templates
-
Apply a template to your presentation
-
Empathise the deviation betwixt PowerPoint templates and themes
-
What is a slide master?
-
What is a slide layout?
Of import: Office 2007 is no longer supported. Upgrade to Microsoft 365 to work anywhere from whatever device and continue to receive support.
Upgrade now
To apply a new or different PowerPoint 2007 template that already exists, see Apply a template to your presentation.
All-time practise for creating a template
When you create a template, add whatever content to the slide master in Slide Master view that you want to protect from being changed by users of your template, such as instructional prompt text, logos, header and footer information, subject matter content, a groundwork, formatting, colors, fonts, and effects.
Users of your template will work in Normal view, guided past the instructional prompts that you added. The template users volition replace the instructional prompt text and other placeholder content with data that is specific to their own project or presentation.
-
Open up a blank presentation.
-
On the Design tab, select Page Setup, and choose the orientation and page dimensions you desire.
-
On the View tab, in the Presentation Views group, click Slide Master.
-
On the Slide Master tab, in the Edit Master group, click Insert Slide Primary.
Notes:
-
In the slide thumbnail pane, the slide master represents the larger slide image, and the associated layouts are positioned below it.
-
Many presentations contain more than one slide master, and so you may have to gyre to observe the one that you want.
-
-
To begin customizing the slide main, do one or more of the post-obit:
-
To remove any of the congenital-in slide layouts that accompany the default slide master, in the slide thumbnail pane, right-click each slide layout that yous don't want to use, and then click Delete Layout.
-
To remove an unwanted, default placeholder, in the slide thumbnail pane, click the slide layout that contains the placeholder, click the border of the placeholder in the presentation window, then press DELETE.
-
To add a text placeholder, in the slide thumbnail pane, click the slide layout that you desire to contain the placeholder, and so exercise the post-obit:
-
-
On the Slide Principal tab, in the Master Layout grouping, click Insert Placeholder, and and so click Text.
-
Click a location on the slide master, and then drag to depict the placeholder.
Tip: To resize a placeholder, drag the corner of one of its borders.
-
Blazon descriptive text that prompts the users of your template to enter specific information.
-
To add other types of placeholders that contain content such as pictures, clip art, SmartArt graphics, charts, movies, sounds, and tables, on the Slide Primary tab, in the Master Layout group, click the blazon of placeholder that you want to add.
-
To employ a theme (to include color, formatting, furnishings, in a layout) to your presentation, on the Slide Master tab, in the Edit Theme grouping, click Themes, and so click a theme.
-
To change the background, on the Slide Master tab, in the Background group, click Groundwork Styles, then click a background.
-
To set the page orientation for all of the slides in your presentation, on the Slide Master tab, in the Folio Setup group, click Slide Orientation, and so click either Portrait or Landscape.
-
To add text to appear in the footer at the lesser of all of the slides in your presentation, do the post-obit:
-
On the Insert tab, in the Text group, click Header & Footer.
-
In the Header and Footer dialog box, on the Slide tab, select the Footer bank check box, and then type the text that you want to announced at the bottom of your slides.
-
To display the footer content on all slides, click Apply to All.
For more information about using footers, encounter Show footer information on your slides.
-
-
-
Click the Microsoft Function Button
 , and so click Save As.
 -
In the File name box, type a file name, or practise nothing to accept the suggested file proper noun.
-
In the Relieve as type list, click PowerPoint Template (*.potx).
When yous choose the "template" type, PowerPoint automatically switches the storage location to the advisable folder, the \Program Files\Microsoft Office\Templates\ binder.
-
Select Save.
-
If you need aid applying your new template to a presentation, encounter Apply a template to a new presentation.
Use a template to a new presentation
See Apply a template to your presentation.
Y'all tin't create a template in PowerPoint for the web. Y'all have to use a desktop version of PowerPoint instead.

How To Make A Gundam Model Logo Template,
Source: https://support.microsoft.com/en-us/office/create-and-save-a-powerpoint-template-ee4429ad-2a74-4100-82f7-50f8169c8aca
Posted by: johnsonroon1987.blogspot.com
0 Response to "How To Make A Gundam Model Logo Template"
Post a Comment